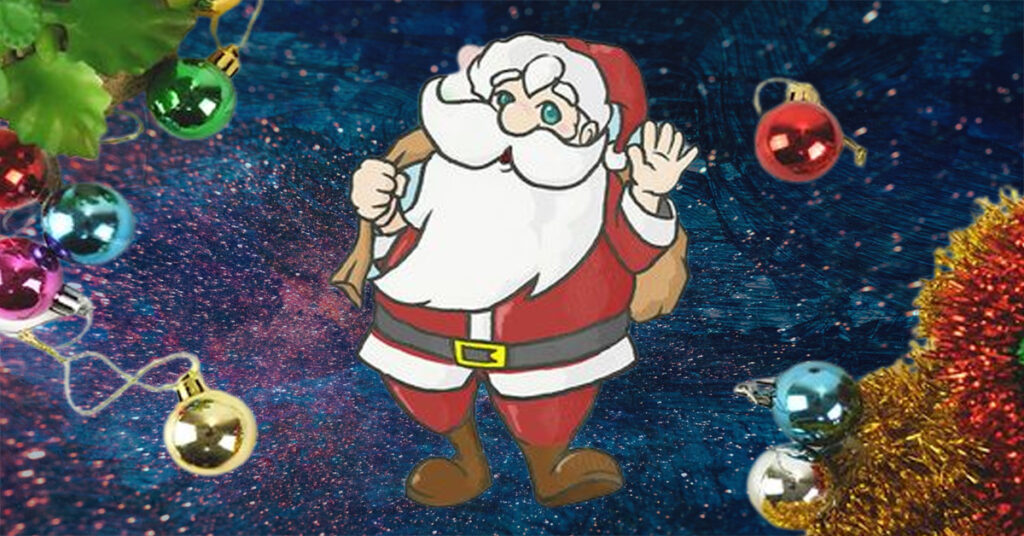
How to draw santa claus and christmas tree
- People ask for:
- How do you draw Santa Claus easily step by step?
- How do you make Christmas Santa Claus drawing?
- How do I draw a beautiful Christmas tree?
- How to make a Christmas tree step by step?
- How do you draw a cute little Santa Claus?
- How do you draw a easy snowman cute?
- How do you draw a silly snowman?
- How do you draw a real snowman?
- How can I draw Snow White?
- How do you draw a Pikachu snowman?
Drawing Santa Claus and a Christmas tree can be a fun activity for the holiday season. Here’s a step-by-step guide on how to draw them:
Drawing Santa Claus:
Step 1: Start by drawing a circle for the head and a large oval shape for the body.
Step 2: Draw two smaller circles for the eyes and add a small circle inside each eye for the pupils. Draw a curved line for the nose and a smile beneath it.
Step 3: Add a fluffy white beard and a mustache.
Step 4: Draw Santa’s hat by starting with a curved line above his head, then drawing a rectangle on top of it, and finally adding a fluffy white ball on the end.
Step 5: Draw Santa’s coat by starting from the top of the body, drawing two curved lines down to the bottom, and then adding the sleeves.
Step 6: Draw Santa’s gloves, pants, and boots.
Step 7: Add details such as a belt, buckle, and fur trim on the coat and hat.
Drawing a Christmas tree:
Step 1: Start by drawing a triangle for the tree shape.
Step 2: Draw a horizontal line near the bottom of the triangle for the tree stand.
Step 3: Add branches to the tree by drawing smaller triangles or shapes along the sides of the main triangle.
Step 4: Draw ornaments on the tree by adding circles or other shapes. Add a star or angel on top of the tree.
Step 5: Add texture to the tree by drawing lines for the bark and shading the branches and ornaments.
Step 6: Finish off by adding presents or other decorations at the base of the tree.
With these steps, you can easily draw Santa Claus and a Christmas tree. Remember to have fun and be creative with your drawings!
People ask for:
How do you draw Santa Claus easily step by step?
Sure, here is an easy step-by-step guide to drawing Santa Claus:
Step 1: Start with the head
Draw a circle for Santa’s head. Add a small curved line at the bottom of the circle for his chin.
Step 2: Draw Santa’s Hat
Draw a triangle shape above Santa’s head for his hat. Connect the triangle to the head with two curved lines.
Step 3: Add Santa’s Beard
Draw a long curved line starting from the bottom of Santa’s hat and connect it to his chin for the beard. Add two more smaller curved lines on either side of the beard for Santa’s mustache.
Step 4: Draw Santa’s Eyes
Draw two small circles inside Santa’s head for his eyes. Add two smaller circles inside the first ones for the pupils. Shade the pupils in except for two small white circles to show reflection.
Step 5: Add the Nose
Draw a small oval shape in the center of Santa’s face for his nose.
Step 6: Draw Santa’s Mouth
Draw a small curved line below Santa’s nose for his mouth. Add a small curved line below that for his tongue.
Step 7: Add Santa’s Suit
Draw a rounded triangle shape below Santa’s head for his suit. Add two curved lines on either side of the suit for Santa’s arms. Draw a small circle on the end of each line for Santa’s hands.
Step 8: Add Santa’s Boots
Draw two rectangle shapes at the bottom of Santa’s suit for his boots.
Step 9: Add Santa’s Belt
Draw a rectangle shape around Santa’s waist for his belt. Add a small square buckle in the center of the belt.
Step 10: Finish with Details
Add details to Santa’s suit, hat, and boots. You can add white fur trim to the hat and coat, buttons on the coat, and a pattern on the boots.
Congratulations! You have successfully drawn Santa Claus.
How do you make Christmas Santa Claus drawing?
Making a Christmas Santa Claus drawing can be a fun and creative activity. Here are some steps to help you make your Santa Claus drawing:
- Start by drawing a large circle for the head and a smaller circle for the nose.
- Draw two small circles for the eyes, and a curved line for the mouth.
- Draw Santa’s iconic hat by making a triangle shape on top of the head, then drawing a rectangle shape for the base of the hat. Add a pom-pom on the top of the hat.
- Add details to the face such as eyebrows, wrinkles, and rosy cheeks.
- Draw the beard by making wavy lines from the sides of the face to the bottom of the head.
- Draw Santa’s suit by making a rectangle shape for the torso, and then adding two half-circles on each side for the arms.
- Draw his belt by making a rectangle shape in the middle of the torso and adding a buckle in the center.
- Draw Santa’s boots by making two long rectangles for the legs, then adding two smaller rectangles for the feet.
- Add details to the suit such as fur lining and buttons.
- Color your Santa Claus drawing with red, white, and black for the suit, and peach or light pink for the face.
Remember, there are many variations of Santa Claus, so feel free to experiment with different shapes and styles to create your own unique Santa Claus drawing
How do I draw a beautiful Christmas tree?
Drawing a beautiful Christmas tree can be a fun and creative activity during the holiday season. Here are some steps you can follow to draw your own beautiful Christmas tree:
- Start with a triangle: Draw a large triangle on your paper, with the widest part at the bottom. This will be the basic shape of your Christmas tree.
- Add branches: Starting at the bottom of the triangle, draw diagonal lines extending out from the sides of the triangle. These lines should be shorter as you move up the tree, creating the effect of branches. Add as many branches as you like, making them more sparse toward the top of the tree.
- Draw the trunk: At the bottom of the tree, draw a straight line extending down from the center of the triangle. This will be the trunk of your tree.
- Decorate the tree: Add ornaments, lights, and a star at the top of the tree. You can also add presents under the tree if you like.
- Add details: Add shading and texture to the branches to make them look more realistic. You can also add snow or other decorations to the scene around the tree to create a winter wonderland effect.
Remember to have fun and be creative when drawing your Christmas tree. Experiment with different colors, shapes, and decorations to make your tree unique and beautiful!
How to make a Christmas tree step by step?
Making a Christmas tree can be a fun and creative project. Here are some general steps you can follow to make a Christmas tree:
Materials:
- Green construction paper or cardboard
- Scissors
- Glue
- Decorations (optional)
Steps:
- Cut out a large triangle shape from your green construction paper or cardboard. This will be the base of your Christmas tree.
- Cut smaller triangles out of your green paper or cardboard to make branches. The number of branches you will need depends on the size of your tree.
- Glue the branches onto the base of your tree, starting from the bottom and working your way up.
- Once you have glued on all the branches, you can decorate your tree with ornaments, tinsel, or any other decorations you like.
- You can also add a star or angel to the top of your tree.
- Let your tree dry, and then display it proudly in your home for the holiday season.
If you want to make a more elaborate tree, you can use other materials like foam or wire to create a sturdier structure. You can also use a variety of decorations, such as lights or ribbon, to make your tree stand out. The possibilities are endless!
How do you draw a cute little Santa Claus?
Here are some steps to draw a cute little Santa Claus:
Step 1: Draw the head Draw a circle for the head, then add a small semi-circle at the bottom for the beard.
Step 2: Draw the hat Draw a triangle on top of the head for the hat. Add a small ball at the end of the hat.
Step 3: Draw the face Draw two small circles for the eyes, a small triangle for the nose, and a smiley face for the mouth.
Step 4: Draw the body Draw a large circle below the head for the body. Add two smaller circles at the bottom for the legs.
Step 5: Draw the arms and hands Draw two small lines on either side of the body for the arms, then add two small circles for the hands.
Step 6: Add details Add a belt around the waist of the Santa Claus. Draw some lines for the cuffs of the sleeves, and add some patterns to the hat.
Step 7: Color it in! Color in your Santa Claus with red and white for the hat and coat, pink for the cheeks, and black for the eyes and boots.
Congratulations, you have now drawn a cute little Santa Claus!
How do you draw a easy snowman cute?
Here are some simple steps to draw a cute and easy snowman:
Step 1: Draw the body Draw a large circle for the snowman’s body.
Step 2: Draw the head Draw a smaller circle on top of the body for the snowman’s head.
Step 3: Draw the eyes and mouth Draw two small circles for the eyes and a smiling mouth.
Step 4: Draw the nose Draw a small triangle for the snowman’s carrot nose.
Step 5: Add the hat and scarf Draw a top hat on the snowman’s head, and a scarf around its neck. You can add some stripes or patterns to the scarf to make it more colorful.
Step 6: Draw the arms Draw two stick-like arms on the sides of the snowman’s body. Add some mittens at the end of the arms.
Step 7: Add some details Draw some small circles for the snowman’s buttons, and some dots for falling snowflakes.
Step 8: Color it in! Color your snowman in white for the body, black for the hat and arms, orange for the nose, and any color you like for the scarf.
Congratulations, you have now drawn a cute and easy snowman!
How do you draw a silly snowman?
Drawing a silly snowman can be a fun and creative activity! Here are some steps you can follow:
- Draw the snowman’s body: Start by drawing three circles of different sizes, one on top of the other. The bottom circle should be the largest, the middle one a bit smaller, and the top one the smallest. These circles will be the snowman’s body.
- Add the snowman’s arms: Draw two stick arms on either side of the middle circle. Make them slightly crooked or uneven to give the snowman a silly look.
- Draw the snowman’s face: Draw two big circles for the snowman’s eyes, and add smaller circles inside for pupils. Give the snowman a big, silly smile by drawing a curved line for the mouth. Add a carrot nose sticking out from the middle of the face.
- Give the snowman some accessories: Draw a scarf or a bow tie around the snowman’s neck, and add some buttons down the front of the body. You could also draw a hat on the top circle of the snowman’s head.
- Make it even sillier: To make your snowman even sillier, you can add some extra details. Maybe draw a few snowflakes falling around it, or draw it wearing sunglasses or a funky pair of shoes.
Remember, the key to drawing a silly snowman is to have fun and be creative!
How do you draw a real snowman?
Drawing a realistic snowman can be a fun and easy activity. Here are some steps you can follow:
- Start by drawing a circle for the snowman’s head, and a larger circle below it for the body. Add a smaller circle at the bottom for the snowman’s base.
- Draw the snowman’s arms. Use straight lines to create the arms, and add some bends or curves to make them look more natural. You can also add some small twigs or branches to the ends of the arms to create a more realistic look.
- Add the snowman’s facial features. Draw two small circles for the eyes, and a small carrot-shaped triangle for the nose. You can add some shading or detail to the nose to give it some texture. Draw a simple smile or mouth shape below the nose.
- Draw the snowman’s accessories. You can add a hat or scarf, or even draw a broom leaning against the snowman. Use simple shapes to create the accessories, and add some folds or texture to make them look more realistic.
- Add some texture to the snow. Use curved lines to create the texture of the snow on the snowman’s body, and add some shading to create the illusion of depth and dimension.
- Finish off by adding some details to the snowman’s base. You can add some small rocks or twigs to create the impression of snow being packed around the base of the snowman.
Remember, when drawing a realistic snowman, it’s important to pay attention to the details and create a sense of depth and texture in the drawing. Use your imagination and have fun with it!
How can I draw Snow White
Drawing Snow White can be a fun and rewarding experience. Here are some steps you can follow:
- Draw a circle for Snow White’s head, and a small oval shape below it for her neck.
- Sketch out her body shape, using basic shapes for the torso, arms, and legs.
- Add some details to her face, including her eyes, nose, and mouth. Snow White typically has large, expressive eyes and a small, delicate nose.
- Draw Snow White’s hair. Her hair is typically dark, with a distinctive part in the middle. Draw long, flowing locks that frame her face and flow down her back.
- Add Snow White’s signature outfit. Snow White wears a yellow dress with puffy sleeves and a blue bodice. Draw the dress with simple shapes, and add details like folds and pleats to make it look more realistic.
- Finish off by adding some accessories. Snow White wears a red bow in her hair, and sometimes carries a basket of apples. You can also draw some woodland creatures around her, like birds or squirrels, to give the drawing some extra detail and charm.
Remember, when drawing Snow White, it’s important to pay attention to the details and capture her signature features. But don’t be afraid to add your own creative touches to make the drawing unique!
How do you draw a Pikachu snowman?
Drawing a Pikachu snowman can be a fun and creative activity. Here are some steps you can follow:
- Draw the snowman’s body: Start by drawing three circles of different sizes, one on top of the other. The bottom circle should be the largest, the middle one a bit smaller, and the top one the smallest. These circles will be the snowman’s body.
- Add the snowman’s arms: Draw two stick arms on either side of the middle circle. Make them slightly crooked or uneven to give the snowman a fun and playful look.
- Draw Pikachu’s face: Draw two large circles for Pikachu’s eyes and add smaller circles inside for pupils. Add Pikachu’s signature round red cheeks on either side of its face. Draw Pikachu’s nose and mouth with a curved line. Add two pointed ears on the top circle of the snowman’s head.
- Give the Pikachu snowman some accessories: Draw Pikachu’s lightning bolt-shaped tail behind the snowman’s body. Add a yellow scarf around the snowman’s neck. You can also draw Pikachu’s arms with its paws at the end of the snowman’s arms.
- Add some texture: To give the snowman a more realistic look, you can add some texture to the snow. Draw some bumps and lumps on the snowman’s body to represent snowballs that have been packed together.
Remember, the key to drawing a Pikachu snowman is to have fun and be creative! You can also experiment with different poses, facial expressions, and accessories to make your Pikachu snowman unique.