How to connect 802.11 n to windows 7, To connect to a Wi-Fi network using the 802.11n standard on a Windows 7 computer, follow these steps:
- How to connect 802.11 n to windows 7:
- Method 1: Using the Network Icon in the System Tray
- Method 2: Using Control Panel
- Method 1: Use Windows Update
- Method 2: Download and Install from the Manufacturer’s Website
- Method 3: Use Device Manager
- Method 1: Windows Update
- Method 2: Manufacturer’s Website
- Method 3: Device Manager
- For Internal Wi-Fi Adapters (PCIe or USB Internal)
- For External Wi-Fi Adapters (USB)
- Internal Wi-Fi Adapters:
- External Wi-Fi Adapters:
- Finding Compatible Adapters:
- More story in Hindi to read:
- Check out our daily hindi news:
How to connect 802.11 n to windows 7:
Method 1: Using the Network Icon in the System Tray
- Open the Network and Sharing Center:
- Click on the network icon in the system tray located at the bottom-right corner of your screen.
- Select the Wi-Fi Network:
- A list of available Wi-Fi networks will appear. Locate your 802.11n network in the list.
- Connect to the Network:
- Click on the network’s name.
- If the network is secured, you will be prompted to enter the network security key (password).
- Enter the security key and click OK or Connect.
- Wait for Connection:
- Windows will attempt to connect to the network. Once connected, you will see a notification confirming the connection.
Method 2: Using Control Panel
- Open Control Panel:
- Click on the Start button, then click on Control Panel.
- Navigate to Network and Sharing Center:
- Click on “Network and Sharing Center.”
- Set Up a New Connection or Network:
- In the Network and Sharing Center, click on “Set up a new connection or network.”
- Choose a Wireless Network:
- Select “Manually connect to a wireless network” and click Next.
- Enter Network Information:
- Enter the Network Name (SSID) of your 802.11n network.
- Choose Security Type (e.g., WPA2-Personal).
- Enter the Security Key (password).
- Check the box “Start this connection automatically” if you want Windows to connect to this network automatically in the future.
- Click Next.
- Connect to the Network:
- Click on the network icon in the system tray.
- Select the network you just added from the list.
- Enter the security key if prompted.
- Click OK or Connect.
After these steps, your Windows 7 computer should be connected to the 802.11n Wi-Fi network. Remember that the specific names of options and menu items might vary slightly depending on your computer and Wi-Fi adapter’s manufacturer.
How do I install 802.11 N driver on Windows 7?
To install an 802.11n Wi-Fi adapter driver on a Windows 7 computer, follow these general steps. Keep in mind that the exact steps might vary slightly depending on the specific adapter you have. Here’s a general guide:
Method 1: Use Windows Update
- Connect to the Internet: Ensure you are connected to the internet via an Ethernet cable or another Wi-Fi adapter if necessary.
- Open Windows Update:
- Click on the Start button.
- Type “Windows Update” in the search bar and press Enter.
- Check for Updates:
- Click on “Check for updates” in the Windows Update window.
- Windows will automatically search for available updates, including driver updates for your hardware.
- Install the Driver:
- If Windows Update finds a driver for your 802.11n adapter, it will be listed under the optional updates.
- Select the driver update for your Wi-Fi adapter.
- Click Install to begin the installation process.
- Follow the on-screen instructions to complete the installation.
Method 2: Download and Install from the Manufacturer’s Website
- Identify Your Wi-Fi Adapter:
- Determine the make and model of your 802.11n Wi-Fi adapter. You can usually find this information on the device itself or in the documentation that came with it.
- Visit the Manufacturer’s Website:
- Go to the official website of the adapter’s manufacturer.
- Download the Driver:
- Look for the support or downloads section on the website.
- Locate the driver software for your specific adapter model and download it to your computer.
- Install the Driver:
- Run the downloaded driver file.
- Follow the on-screen instructions in the installation wizard.
- Reboot your computer if prompted to do so.
Method 3: Use Device Manager
- Open Device Manager:
- Right-click on Computer or My Computer on your desktop or in Windows Explorer.
- Select “Manage” from the context menu.
- In the Computer Management window, select “Device Manager” from the left sidebar.
- Locate the Wi-Fi Adapter:
- In Device Manager, find and expand the “Network adapters” section.
- Look for your 802.11n Wi-Fi adapter in the list. It might be listed with a generic name if the driver is missing or outdated.
- Update the Driver:
- Right-click on the Wi-Fi adapter.
- Select “Update driver software…” from the context menu.
- Choose “Search automatically for updated driver software.”
- Windows will search for the latest driver software online and install it.
After following these steps, your 802.11n Wi-Fi adapter should be installed and ready to use on your Windows 7 computer.
Can we install Wi-Fi driver in Windows 7?
Yes, you can install Wi-Fi drivers in Windows 7. In fact, installing the correct Wi-Fi drivers is essential to enable and use wireless networking capabilities on your Windows 7 computer. There are a few methods to install Wi-Fi drivers:
Method 1: Windows Update
- Connect to the Internet: Use an Ethernet cable or another computer with internet access to download the drivers.
- Access Windows Update:
- Click on the Start button.
- Type “Windows Update” in the search bar and press Enter.
- Check for Updates:
- Click on “Check for updates” in the Windows Update window.
- Windows will automatically search for available updates, including driver updates for your Wi-Fi adapter.
- If a Wi-Fi driver update is found, it will be listed under optional updates.
- Select the update and click Install.
Method 2: Manufacturer’s Website
- Identify Your Wi-Fi Adapter: Determine the make and model of your Wi-Fi adapter. This information can usually be found on the device itself or in the documentation.
- Visit the Manufacturer’s Website:
- Go to the official website of the Wi-Fi adapter’s manufacturer.
- Download the Driver:
- Locate the support or downloads section on the website.
- Find the driver software for your specific adapter model and download it.
- Install the Driver:
- Run the downloaded driver file.
- Follow the on-screen instructions in the installation wizard.
- Reboot your computer if prompted to do so.
Method 3: Device Manager
- Open Device Manager:
- Right-click on Computer or My Computer on your desktop or in Windows Explorer.
- Select “Manage” from the context menu.
- In the Computer Management window, select “Device Manager” from the left sidebar.
- Locate the Wi-Fi Adapter:
- In Device Manager, find and expand the “Network adapters” section.
- Look for your Wi-Fi adapter in the list.
- Update the Driver:
- Right-click on the Wi-Fi adapter.
- Select “Update driver software…” from the context menu.
- Choose “Search automatically for updated driver software.”
- Windows will search for the latest driver software online and install it.
After following one of these methods and successfully installing the Wi-Fi drivers, your Windows 7 computer should be able to connect to Wi-Fi networks. Remember that it’s important to install the correct drivers specific to your Wi-Fi adapter for optimal performance and stability.
How do I find my WiFi driver on Windows 7?
To find your Wi-Fi driver details on Windows 7, you can use the Device Manager. Here’s how you can do it:
- Open Device Manager:
- Click on the Start button.
- Right-click on Computer (or My Computer) and select “Manage.” This will open the Computer Management window.
- In Computer Management, click on “Device Manager” in the left sidebar.
- Locate Network Adapters:
- In Device Manager, find and expand the “Network adapters” section. This will show you a list of all network adapters installed on your computer.
- Find Your Wi-Fi Adapter:
- Look for your Wi-Fi adapter in the list. It might have a name like “Wireless Network Adapter” or a specific model name and number.
- Right-click on the Wi-Fi Adapter:
- After finding your Wi-Fi adapter in the list, right-click on it.
- Select “Properties” from the context menu.
- View Driver Details:
- In the Properties window, go to the “Driver” tab.
- Here, you can see details like the driver provider, date, and version.
This information tells you about the installed driver for your Wi-Fi adapter. If you’re looking to update or troubleshoot your Wi-Fi driver, knowing these details can be essential. If you need to update the driver, you can do so from this window by clicking the “Update Driver” button and following the prompts.
How do I install a WiFi adapter on my computer?
Installing a Wi-Fi adapter on your computer involves both physical installation (if it’s an internal card) and software installation (for drivers). Here’s a step-by-step guide for both scenarios:
For Internal Wi-Fi Adapters (PCIe or USB Internal)
Physical Installation:
- Power Off Your Computer:
- Shut down your computer completely and unplug it from the power source.
- Open Your Computer Case:
- If you’re installing an internal PCIe Wi-Fi card, open your computer case using appropriate tools.
- Locate an available PCIe slot on your motherboard. Remove the corresponding slot cover from the case.
- Insert the Wi-Fi Card:
- Carefully insert the Wi-Fi card into the PCIe slot on the motherboard. Make sure it’s securely seated.
- Attach Antennas (if applicable):
- If your Wi-Fi card has external antennas, attach them securely to the card.
- Close Your Computer Case:
- Close your computer case and secure it with screws.
Software Installation (Driver Installation):
- Power On Your Computer:
- Plug in your computer and power it on.
- Insert the Driver Installation Disc (if provided):
- If your Wi-Fi card came with an installation CD, insert it into your computer’s optical drive. The installation process might start automatically. Follow the on-screen instructions.
- Download the Latest Drivers (Recommended):
- It’s often best to download the latest drivers from the manufacturer’s website. Go to the official website of the Wi-Fi adapter’s manufacturer and locate the drivers section. Download the appropriate drivers for your operating system.
- Install the Drivers:
- Run the downloaded driver file.
- Follow the on-screen instructions in the installation wizard.
- Reboot your computer if prompted to do so.
- Verify the Installation:
- Once your computer has restarted, check Device Manager to ensure the Wi-Fi adapter is listed without any errors.
For External Wi-Fi Adapters (USB)
Physical Installation:
- Unbox the Wi-Fi Adapter:
- Take the external Wi-Fi adapter out of the box.
- Insert the USB Adapter:
- Insert the USB end of the Wi-Fi adapter into an available USB port on your computer. It should be a plug-and-play device, and Windows will often automatically recognize it.
Software Installation (Driver Installation – If Necessary):
- Windows Automatic Installation:
- Many USB Wi-Fi adapters are recognized by Windows automatically, and the necessary drivers are installed automatically through Windows Update. Check your Wi-Fi connectivity to see if it’s working without manual installation.
- Download Drivers (if Windows doesn’t install automatically):
- If Windows doesn’t automatically install the drivers, download the latest drivers from the manufacturer’s website. Most manufacturers provide drivers for download on their official websites.
- Install the Drivers:
- Run the downloaded driver file.
- Follow the on-screen instructions in the installation wizard.
- Reboot your computer if prompted to do so.
- Verify the Installation:
- Check Device Manager to ensure the Wi-Fi adapter is listed without any errors.
After following these steps, your computer should be equipped with a functional Wi-Fi adapter, allowing you to connect to wireless networks.
Which network adapter is for WiFi Windows 7?
Windows 7 supports a wide range of network adapters for Wi-Fi connectivity. When it comes to Wi-Fi adapters, they can be broadly categorized into two types: internal and external.
Internal Wi-Fi Adapters:
**1. PCIe Wi-Fi Cards: These are internal Wi-Fi adapters that are installed directly into the motherboard of your desktop computer. They come in the form of PCIe cards and provide a stable and integrated Wi-Fi connection.
**2. Mini PCIe Cards: Some laptops use mini PCIe cards for Wi-Fi connectivity. These are smaller versions of the standard PCIe cards and are designed specifically for laptops.
**3. M.2 Wi-Fi Cards: Modern laptops often use M.2 slots for Wi-Fi and Bluetooth connectivity. M.2 cards are compact and provide both Wi-Fi and Bluetooth functionality.
External Wi-Fi Adapters:
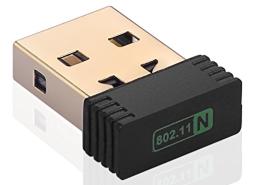
**1. USB Wi-Fi Adapters: These are external adapters that connect to your computer via a USB port. They are the most common type of external Wi-Fi adapters and are often plug-and-play, meaning they are automatically recognized by the operating system without needing to install additional drivers.
**2. Wi-Fi Dongles: Similar to USB Wi-Fi adapters, these are compact devices that plug into a USB port. They are often used for devices like desktop computers that don’t have built-in Wi-Fi capabilities.
Finding Compatible Adapters:
When choosing a Wi-Fi adapter for Windows 7, make sure to check the product specifications provided by the manufacturer. Look for information indicating compatibility with Windows 7. Most Wi-Fi adapters designed for Windows 7 will also work with later versions of Windows, but it’s crucial to confirm this information before making a purchase.
Additionally, it’s advisable to go for reputable brands when purchasing network adapters. Well-known brands often provide better driver support and compatibility with various operating systems, including Windows 7. Some popular Wi-Fi adapter manufacturers include TP-Link, Netgear, ASUS, D-Link, and Intel.
Always check the specific requirements and compatibility information provided by the manufacturer before purchasing a Wi-Fi adapter to ensure it is compatible with your Windows 7 system.
More story in Hindi to read:
Moral stories in Hindi for class